Tutorials - Mapping
Getting Started!
So, you want to start creating levels for MageSlayer/Take No Prisoners? If that's the case, you don't need to look any further than this guide on how to get started.
Keep in mind that this is a rather complex process, and it will remain so until modern editing tools become available.
Here is what you need:
- Editing Tools (BSP/FACIFY/BSPBIN + Plugins for 3D Studio MAX 1.2)
- 3D Studio MAX 1.2 (A copy can be found on Archive.org, but make sure a crack is included for reasons below)
- MilkShape 3D 1.8.5 (Or some other program that can export .OBJ to .3DS format that works on older versions of 3DS Max)
- A modern 3D modelling program or level editor of choice (I recommend Ultimate Doom Builder or Trenchbroom)
I also recommend setting all of this up either by using a spare machine or through a Virtual Machine. I say this because we're dealing with an ancient and outdated modeling tool that was released in 1996 for Windows 9x/NT platform and could potentially be a hassle setting it up in modern OSes. I personally recommend using a Windows 2000 VM via VMWare Workstation (or Workstation Player)
If you wish to try installing 3D Studio MAX 1.2 natively on modern hardware, but I feel like using a VM is a cleaner solution in my opinion. Also if you don't want to go through the process of manually installing Windows 2000. I would check out the pre-installed VMDK of Windows 2000 SP4 at winworldpc.com - Setting up 3D Studio Max 1.2 and Plugins -Once you have a working environment (in my case, I am using a VMware instance of Windows 2000 SP4) and a .ISO of 3DS Max 1.2, Go ahead and mount the .ISO inside the Virtual Machine Settings. 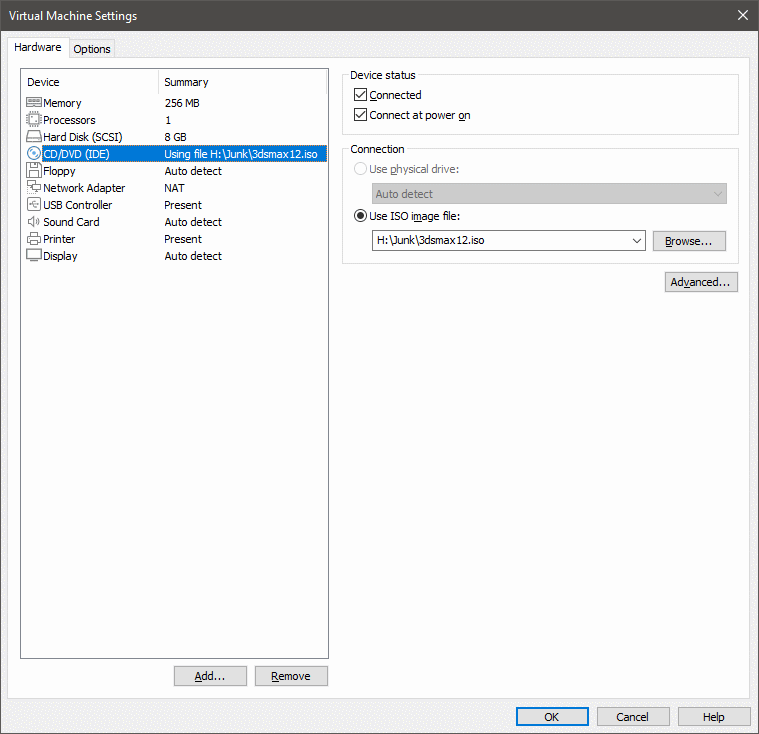
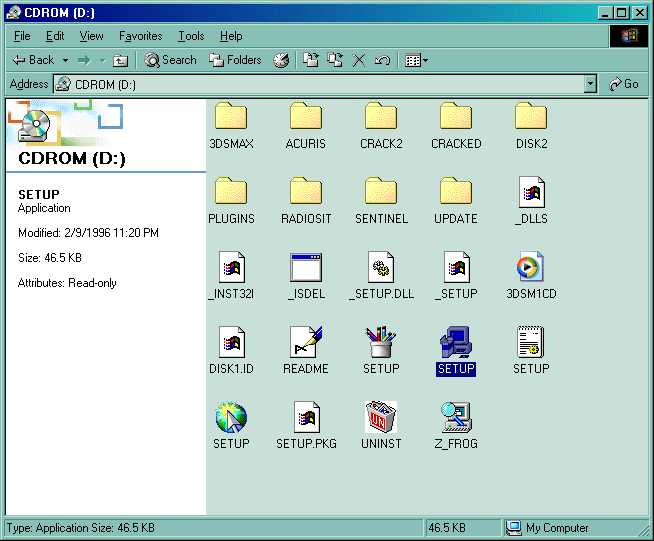
After the CD is mounted, go ahead and run the setup program and install the program. (I installed in C:\3DSMAX12)
 Now keep in mind that the program by itself is dongle-locked and thus a crack must be installed in order to use 3DS Max 1.2. In my case a modified 3DSMAX.EXE is in my copy I found so copy and paste that to where you installed 3DS Max. Afterwards restart your virtual machine for changes to take effect (otherwise it won't run)
Once you are able to get 3DS Max working, next thing to do is install the plugins provided inside "mtools.zip", the two files being "VMDEXP.DLE" and "VAMPED.DLU" to the "plugins" directory from your 3DS Max install (This also works with the "stdplugs" directory as well) 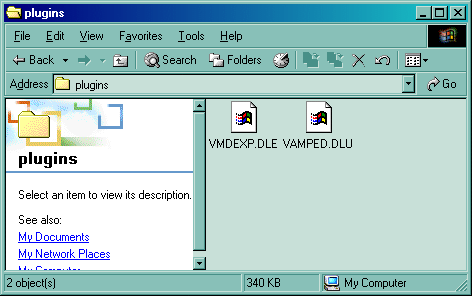
- Setting up MilkShape 3D -Now installing MilkShape 3D is practically straight-foward, but the only caveat you either have to run the 30-day trial or find a key off the internet. If there is another tool that works for Windows 2000 that is freeware and can export a .3DS model that works under 3DS Max 1.2 (I recall a plugin for Blender exists but tried it and 3DS Max 1.2 couldn't load the model) then I would use that instead.
Also the primary reasoning behind using this is because 3D Studio MAX 1.2 doesn't have support for importing .OBJ files, and in order to get the geometry into 3DS Max 1.2 would be to convert the .OBJ to .3DS format
Another caveat is that after converting the model, the geometry gets flipped upside down and rotated, so you have to rotate the geometry back to normal. (I will explain that in a future tutorial) - Why use Ultimate Doom Builder/Trenchbroom/etc? -Because learning how to use a old and outdated 3D modelling tool in today's standards can be a pain to learn and there are far easier progams out there (look at Blender for instance)
Meanwhile you can make the geometry inside Blender, but in my case I fire up Ultimate Doom Builder and make a map in UDMF format (for GZDoom) while having gzdoom.pk3, a Doom IWAD (Freedoom also works!), and a .PK3 containing the game's textures (See Tools)
After you are satisfied with the result, you go ahead and export the map as an .OBJ file. 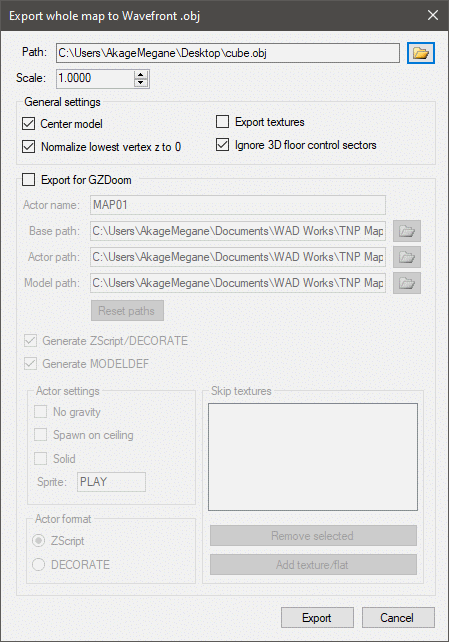
- Conclusion -I do expect to update this tutorial as things develop and I learn as I go. If anything is missing, feel free to contact me. Anyway stick around for more tutorials.
|